Monday, October 26, 2009

Tick Tock, Look how I made a Clock!

I went to Goodwill a couple of weeks ago to find some flannel shirts to make some fall pillows.  It took me 10 minutes just to find a parking spot!  I struck out on the shirts but as I was waiting in line I spied a good frame.

unfortunately it had this really cool suede print of a dog in it.  Ivy kept saying "ahhh how cute!".  Little did she know that the dog had to go.  I love the shape of the frame though so the dog came home with us.  It sat for a couple of weeks until I finally decided to make a clock with it. 


First I took the dog print out, then sanded and painted the frame with American Accents Canyon Black  spray paint. 


While the paint dried I used spray glue and covered the dog print with burlap. 


I cut out the 12,3,6 and 9 out of some scrap fabric (I'm loving houndstooth right now!) I just wasn't digging the burlap though.


So I switched to the red print which is actually my favorite fabric right now.  Its a plaid AND polka dots.  My favorites.  Anyways.  I hot glued the numbers down and marked the center.


I used this clock kit from Michaels and used my 40% off coupon so it was only $3.50.!


I sprayed the hands with some Rustoleum Oil Rubbed Bronze spray paint.


Here it is on the wall.  I'm still trying to figure out something to put in the center.  I love it though, even if I can see how late it is getting when I'm trying to finish a project now.

I''m linking this to DIY Day on A Soft Place To Land.


DIY Day @ ASPTL

Friday, October 23, 2009

Birthday Wish List

I only have one week left of being in my 20's. Surprisingly I'm not sad about it. I only have one regret about leaving the last decade behind. I really wish that we had been able to have more kids BUT I'm so grateful to have Ivy around to keep me plenty occupied. Enough of that though.  My sister asked me what I want for my birthday so here's my wish list...


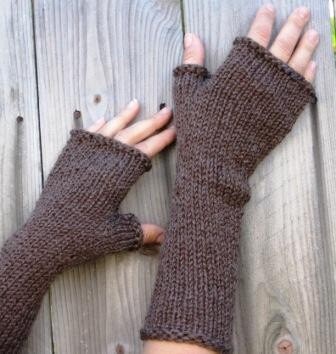
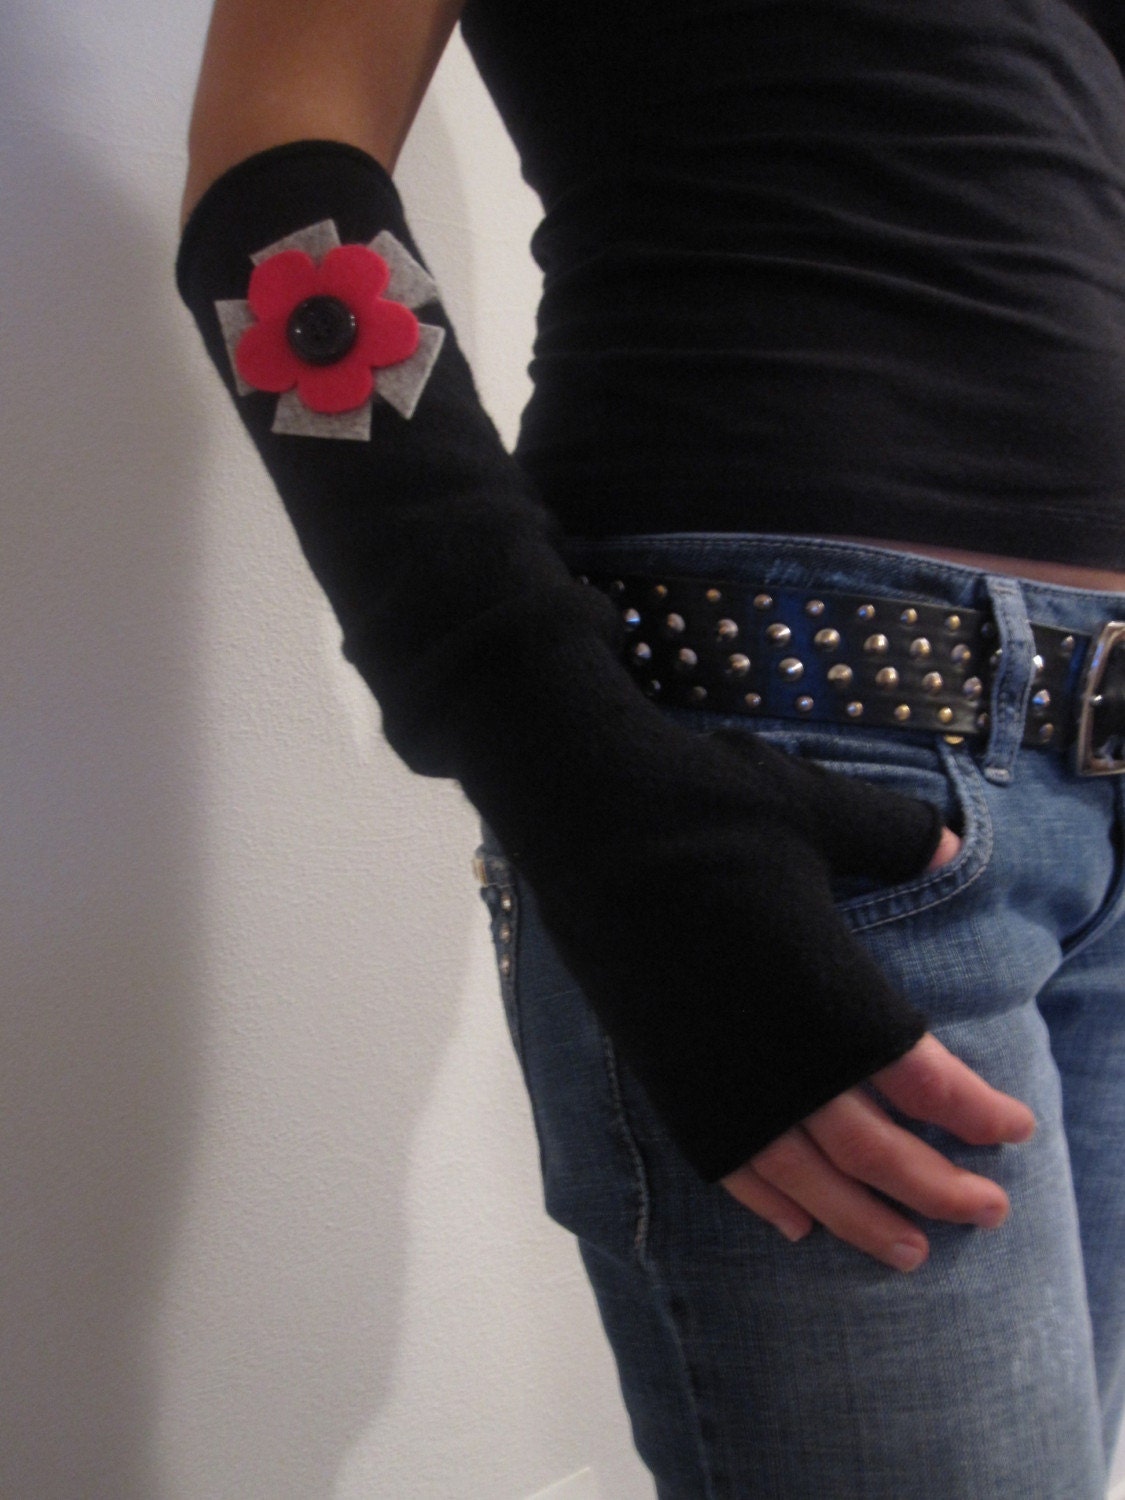
These fingerless gloves from etsy.  I would add a crochet flower too. 
Or I also like


 I would also like, a 20 inch and a 16 inch pillow form. 

But what I would really like is two more hours in the day.  Preferably sandwiched in between 8 and 10 pm.

I could also use some elves that came and cleaned my house while I sleep at night.  I could just borrow the shoemakers elves.  And if they wanted to make me some shoes every night while they were at it I wouldn't complain. 

And lastly I would take $100 for every year I've been alive. 

That's not asking for too much is it? 

EDIT!!  I also really love the acorn and oak bowls from Williams-Sonoma.


Sunday, October 18, 2009

Spooktacular Frames


I got two of these 11x14 frames at Target for $3.00!  I have other ones in my house just like them that I didn't pay $3.00 for.  I love them though.  I need more on a wall in the dining room so I thought these might help.  I decided to use up some of the burlap I have to make some halloween-ish art.  I think it will work for just fall decor also.


Whoops I didn't rotate the photo.  But I cut an 11x14 piece of fabric (from the Spooktacular line) and used spray adhesive to glue it to the piece of cardboard that came in the frame.


I loved the swirls in the images I picked (from the DB Fright Night font) and I knew there was no way I could get that detail from stenciling so I cut them out on our vinyl cutter.  I put this tree on a 5x7 piece of burlap.


Then put that on the black and white fabric.


For the other frame I glued burlap to the cardboard insert then just put the pumpkin on the burlap.  I think the pumpkin was about 10x10.  


I hung them up a little off center next to my REALLY big star.


I am still trying to figure out what else to put up so I stare at this wall a lot but It definitely looks better.

I'm linking this to the DIY Show Off Fall Festival!

The DIY Show Off


Spooky Quesadilla


I made this quesadilla for Ivy yesterday and now all she wants is a quesa-a-a-dilla. 
Just cook the cut out side first and don't melt the cheese too much so it doesn't ooze out. 
Ivy loves Halloween so much and she doesn't even really know what it is!

Thursday, October 15, 2009

Spooky Soup

Every October I wait for the perfect cozy fall day to make Spooky Soup.  We had it my friend Carrie's house probably five years ago and I've made it ever since.  Its chili and whats spooky about it is that its orange!  Its great for football Sundays and a fun Halloween dinner.  I didn't get a picture but I thought I would share the recipe.

SPOOKY SOUP

1 1/2 lbs. ground beef
1 onion, chopped
 15-oz. can chili
 15-oz can stewed tomatoes
2 16-oz cans pinto beans
10-oz can tomatoes with chiles
2 cups sour cream
1-lb pkg. velveeta, cubed
fritos

Brown ground beef with onion; drain.  Add chili, stewed tomatoes, pinto beans, and tomatoes with chiles; simmer one hour.  Add sour cream and velveeta and simmer 1-3 more hours.  Spoon into serving bowls and serve with fritos.  Serves at least 6.

Monday, October 12, 2009

Upcycling- Onesie and tanktop equal New Dress!


I got this for Ivy in the spring.  I think about 3 weeks later she grew an inch and it was too short.    So its been hanging around waiting to be used.


My sister in law just had her last baby and gave me back my maternity clothes, plus some of hers.  This tank top was in there.  When I saw it I knew it was time to use that onesie.


So I cut the bottom of the tank top off and cut the onesie about where I thought an empire waist would be on Ivy.  ( I added an inch for good measure and seam allowances.)  The tank top was a maternity shirt so the front was longer then the back.  I made sure that the bottom was even and the cut the extra off so the front and back were straight across at the top.


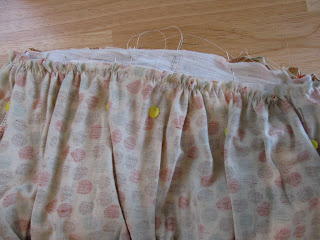
Then I gathered the top by setting my sewing machine to a long stitch.  Luckily my machine just kind of gathers the material on its own when I do this.  Make sure that the width is as wide as the bottom of the onesie.


With right sides together pin your skirt and onesie together.  Use a lot of pins because gathers tend to move a lot.  Make sure to match up your side seams.


Next machine stitch it together and finish your edges with either a serger or a zig zag stitch.


Turn right side out press and you are done!


I used that extra strip of fabric to make a rosette and stitched it to the shirt.  They are so cute I couldn't help it.

This was SO easy.  I think it took 1/2 hour to do (not including the rosette.)

THEN... I took the bottom of the onesie and made a diaper cover.


Finish the top edge of the bottom half and fold down about an inch(or more or less depending on the width of your elastic).  Stitch all the way around, but leave a 1-2 inch opening to insert your elastic.


Cut your elastic the length of the waist measurement.  Feed through the casing and stitch the ends of the elastic together (overlapping about an inch) with a zig zag stitch.


Sew up the opening and topstitch around the very top of the casing.   Now you have a diaper cover to match.!

Sunday, October 11, 2009

Hand Warmers


   I  have been going gaga over all of the fingerless gloves/armwarmers on Etsy recently and decided that's what I should ask for for my birthday (hint hint Mom!)  Well it got really cold here on Friday night.  Since my birthday isn't for a couple of weeks, and I can't crochet or knit I came up with some of my own.  I took the idea from making baby legs and my friend Sarah who wore something like this in her marathon.


First I found a pair of socks that I was willing to part with.  These were starting to get worn through in the bottom so what the heck. And I think they are perfect for my Halloween costume!


I then cut them off right at the ankle, above the heel.


Really you could be done there.  But I wanted a hole for my thumb, so I could do things like stitching or typing on the computer.


So I cut just made a tiny cut with my rotary blade about 1 1/2 inches down from the top.


Ta Da!  A thumbhole.
I didn't want to stretch out the openings by putting it on my sewing machine, so I just left the edges raw. I also dig how it looks!  I might put some fray check on the cut edges to keep it from unraveling at all.


So there you go, some easy handwarmers for chilly fall days.   I think I'm going to use these for my Halloween costume too.  And hopefully this will keep me from stretching out all of the sleeves on my sweatshirts!

Saturday, October 10, 2009

Ivy Beanbags


I got started on Ivy's alphabet bean bags yesterday.  Lucky for me she only has three letters in her name! I used a tutorial from (imagine that) Lil Blue Boo.  I changed it up a bit though.  Instead of stenciling the letters on, I appliqued felt letters.  I'm kind of burned out on cutting out freezer paper so I cut out the felt instead.  I also wanted something to do to keep my hands busy while watching football, and this is perfect.    I have been wanting to do something to work on numbers and counting with Ivy so I decided to do letters on one side of the beanbag and numbers on the other.


And wouldn't you know it?  IVY WARNICK is ten letters.  Perfect match for 1-10..  Maybe someday I'll do all twenty six letters of the alphabet, but I don't know what we would do all those beanbags.

Thursday, October 8, 2009

The Polka Dot Chair

I don't even know how I found this giveaway but it is for a very awesome banner that would look very good with my white pumpkins and a couple of other things I just made (post coming soon!).  I then proceeded to look at everything else on this blog and get more inspired by the second.  And I am super jealous of her craft room.  So go check out this cute blog and enter her giveaway (or not, cuz I want to win!) but do check out The Polka Dot Chair!

Thursday, October 1, 2009

Boo-tiful Burlap

I'm loving all of the black and white Halloween decorations this year.  I'm also loving the burlap.  But I also love all the fall decorations that I already have making it hard to justify a complete switch.  So I found a couple of things to incorporate and blend the two.


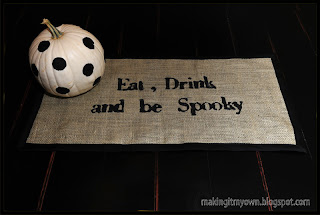
I used this tutorial on Everyday Chaos to make her super cute BOO banner.  I then proceeded to make about 10 of them.  So if you get one from me aren't you lucky.  Then I still had some burlap and tried to figure out what else I could make to match.  I used the same font and freezer paper stencil method as the banner but made a table runner instead.


I cut a piece of burlap 14x28.  Then I used a package of black quilt binding to give it a frame.  Then stenciled on the letters in one big stencil.  Not a fan of cutting out so many letters but it turned out cool.  I especially love the glitter in the paint (which you can't see in the pictures) and how it dresses up the burlap just a bit.  Lucky for my friend Amber she gets a BOO banner and this table runner for her birthday!  Hopefully she doesn't see this before she gets it in the mail! And this is Ivy on Lowly the Worm.  And she only stays in her pajamas all day sometimes!


LinkWithin

Related Posts with Thumbnails