Showing posts with label Halloween. Show all posts

Friday, October 12, 2012

Halloween Subway Art. Printable


If you follow me on Instagram you've seen that I have been working on a holiday planner.  I'm moving on to Christmas now that I finally did my Halloween title page.  My goal is to have it done and ready to bind by Monday.  Yeah....Wish me luck on that one.  

I made a small subway art that I printed on to kraft paper but I've made it a bit bigger and uploaded it to Scribd as a PDF if you want to print one out.  It is sized as an 8.5x11 to print, but the words fit in a 8x10 frame.  You will just need to trim the edges if you want to do that.  I used some of my favorite fonts like Bebas and Blackout along with a couple others.    I also had a mini treat yo'self moment {I can not be held responsible for things I do while taking nyquil} and got the Insta Patterns kit from Rhonna Farrer.  It's been on my wish list for awhile.   That is where the chevron and dots come from.  Pompadour is the font I used for the numbers.


Get your halloween subway art to print HERE.  I Hope you have a fallish, halloweenish weekend!

Photobucket

Monday, November 1, 2010

My Dragon, uh I mean Princess...

My little girl was going to be a dragon for Halloween.   Or more specifically Toothless.   She decided two months ago and hadn't waffled one bit.  She loved telling Grandma's and Grandpas at Costco, and everyone else that she was a dragon. 

Until Friday night. 

We were at her cousins house and Ivy fell in love with a "Belle" dress.  Like gaga.  She wouldn't take it off.  Begged her aunt Laney to borrow it.  She even wanted to wear it to bed.  The next day I tried to talk her in to the dragon costume, with no such luck.  And since I'm learning which battles to pick with this one, I knew it wasn't worth the fight. 


Luckily, I am a good mom {really I am!} and knew that she would pick the princess dress.  So I stayed up  late Friday night and fixed it a little bit.  I added the pick-ups using elastic thread to really get the Belle effect.  I patched a few holes and ironed it so it would be ready for my little princess... 


...who loved it.  And since she had been waiting EVER so patiently for Halloween to come she got to go trick or treating three times on Saturday. 


But just like last year she had way more fun handing out the candy. 
In her dragon costume. 
Photobucket

Thursday, October 28, 2010

Ivy's Pumpkin Party

On Monday Night Ivy hosted her First Annual Pumpkin Party.  She has been asking if it was Halloween yet for 2 months, and has been wanting a party if the worst way.  So we invited all of Darin's family over to carve pumpkins!

I turned to my trusty friend, Picnik to help me out with the invitations.  I saved a blank image  in photoshop the size that I wanted -4x8- then imported that in to Picnik and used their halloween stickers and fonts to whip this up.   Then I imported it back into photoshop so I could print three on a page.  I know, I know, sometimes I cheat on Picnik, but as much as I love it, there are some things it just can't do ;)


 After I  printed it out, I used my favorite Halloween paper and my big shot to decorate the other side. Check out that creepy spider shadow!


  We hand delivered the invitations then waited for our party.  After my apple-palooza this weekend I decided to buy all of the food go easy on myself for refreshments  We had chips and salsa, apples with caramel dip, and pumpkin donuts.  


Since I went the easy route on the food it freed up some time to make a couple of decorations!  {Cuz I would much rather do that then make cookies!}  I made some food label thingy's using picnik - of course- to put by the food and drinks.  I also put together a little banner using cardstock and some baker's twine. 


Ivy had a blast playing with her cousins more than anything.  It was all we could do to tear them away to carve pumpkins for a few minutes! Darin had elaborate plans for a witch, but he decided to go the easy route too, and went for the goofy smile instead.


And that, my friends is exactly why we moved here.  So we could do things like have pumpkin parties with our family and Ivy could be the bestest friends with her cousins.  Thanks Warnicks for coming!   
Photobucket

Wednesday, October 20, 2010

Scary On

Just stopping by to show you a snippet of my Halloween!  The weather has been so glorious this week.  So we are soaking up all of the last warm rays at the park.  I hope you are having a fabulous day!
Photobucket

Tuesday, October 12, 2010

Sneaky Time!

We got Boo-ed a couple of weeks ago.  So that Monday night we headed out to Boo some of our neighbors.  Ivy had a blast and since we were being sneaky, she started calling it "Sneaky Time".  Just about every night when it starts to get dark she asks if it is sneaky time. 

{I know this isn't too sneaky but its from our new favorite Halloween book Ghosts in the House, and it has the cutest pictures!}

So tonight we are off to do sneaky time and BOO some more neighbors.
 If I was more on top of things I would make my own BOO signs and then share it with you.  But today not so much, so I'll share some fun ones I found.


These all come with the instructions and are free.  Aren't these ladies so nice to share, making my life a little easier?! So now the fun part :: making the treats!  I love it because I get to make the yummy stuff {my favorite part is the making- believe it or not} , and then it all gets out of my house so I don't eat it!  

Today we are making Oreo Bark.  You can find a great recipe HERE at Home Based Mom
Some other great treats would be any of those I mentioned yesterday,  or better yet...


... my other favorite cookie I posted about last year.  
{ I think I have a thing for chocolate and peanut butter! }

If you don't want to give out treats, you could even give a copy of your favorite Halloween book. 

Soon it will be sneaky time so I better get to it!  You can't keep a three year old waiting ;)


Photobucket

Friday, October 8, 2010

Boo-tiful

I've had about 10 projects started this week and haven't quite finished a single one!  Its been driving me crazy.  Some things I can't help, like the fact that Hobby Lobby isn't open yet and they have the wood shapes that I need. On others I just hit the wall and can't figure out quite the right way to finish it off.  Does that ever happen to any of you?  
 +++
I've also been adding touches of Halloween to Ivy's room with some of the fab scrapbook paper out this year! I love using paper because Its cheap, and you can change it every year if you want, without feeling too guilty!

  
This cute little witch comes by way of my mom's cricut.  I cut her out a couple of weeks ago, and the oval frame I cut probably six months ago.  I added a tiny black stone to her wand tip.  I love her cute little nose.  


Ivy is loving all the "BOO" everywhere. She reads the letters and tell me that it spells BOO.  Which is too crazy for me.  The other day we were at Costco.  As we were walking in she stops outside and points to the letters.  "Thats a C and an O and an S and a T and a C and a O.  That spells Costco!" 
Why yes Ivy it does.  Now stop growing.  

{In case you were thinking, WOW she is incredibly smart!  She is.  But she also kept telling me that she learned about the letter C at school.  When they most definitely learned about the letter E.}

The glitter candlesticks are a Martha Stewart thing from Michaels.  And I need to cut the tag off of that Bat pillow! I got the letters from Hobby Lobby a long time ago, but they now have them at Craft Warehouse!


This is the most perfect Halloween kids craft.  They get to paint somewhere besides paper, use glitter and its not too spooky.  One of the hardest parts about doing crafts with Ivy for me is letting her have the control.  I think I did pretty well this time.  Just take a look at that  not quite right cute mouth!  We added a sweet bow for good girly measure.

Thats just a couple of little things we've done,  but all the little touches make it BOO-tiful! We hope you have a BOO-tiful weekend!
Photobucket

Monday, October 4, 2010

I heart Picnik part 2 {spookify your photos}

You know how I heart Picnik?  Well I also love Halloween {even more now that Ivy loves it}.  So when I logged in to Picnik on Thursday to edit some photos I immediately got distracted by their Halloween actions!  Ivy and I had a blast trying out all of the different stuff.  
 In the CREATE tab on Picnik, under FEATURED is where all of their Halloween stuff is.  Did you notice my picture on the side bar?

I turned myself into a vampire!  First up Vampire Eyes in yellow.  Then the Dracula Dermis {hungry} all over.  I added the fangs and sized them and turned them to fit my mouth.  Then I scrolled down to the stickers and added the bat sticker.  I faded it so it was a bit transparent.  Then add some spooky text and you've got a Spooky Profile Picture!
{before and after}

 After that I thought well why not "spookify"  my header too?!  So I did just that.  I went back to my original files.  *Tiny tip when making a header*.  Save just your first layer in the size you want.  Then if you ever want to do minor changes like fonts you don't have to figure out the width or color again.
  

Here's mine.  I wanted it to have the same feel so here we are at square one.  


The first step I did in photoshop.  I added this rad overlay.  Its from the Bootiful Overlays on Lettering Delights. {They are on sale for a $1!} I love the black texture it adds. 


Then I took it to Picnik and added the text.  First the orange at the bottom and then the gray.  I think this is WAY easier in Picnik than photoshop.  They have fun fonts and any changes show up right away.  Plus it is so easy to slide that size slider!  Isn't {easy} technology the best?!

Here's some more profile pictures...

 {glasses mask, enlarged and rotated}

{masquerade mask, enlarged, rotated, and turned pink}

Ivy said... Mom!  Look at your beautiful eyelashes! 

 {spider sticker, enlarged and faded.  Spiderweb}

I was amazed at how much you could tweak the spiderwebs.  Thin, thick, skewed, style, glowing.  And it was all on sliders.  LOVE IT!

So go forth fellow picnikers!  Spookify your blog. I want to see what you come up with!  It would be fun for your facebook photos too.  Oooh and to replace some of your smaller framed photos around the house!  or...or...


Photobucket

Tuesday, September 21, 2010

Craft Projects for Project: Craft

Happy Fall Everyone!  
Ivy and I spent the last week in Portland so we are still getting back in to the groove around here.  It is always super fun hitting up the Big City!  The highlight for me was actually taking Ivy to the Children's Museum.  If the fire alarm hadn't gone off after 4 hours of playing we probably would have just stayed all day!
Well Project:Craft is this Saturday and after getting my ticket in the mail over the weekend I am getting super excited.  I just don't know what to bring as a craft!  And you probably haven't either I'm guessing ;).  So here's some ideas for you! {and me}

  I just pulled out my Halloween countdown and still love it!  
{I've got kits available for Halloween or Christmas.  Just email me if you want to make one!}
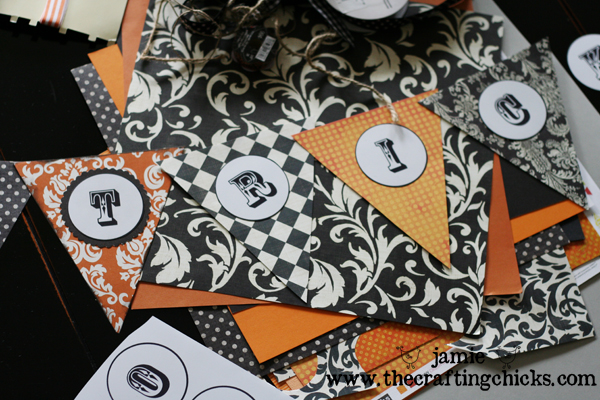
A pennant banner!  The Crafting Chicks share a super cute halloween one! I'm in need of a birthday one myself...
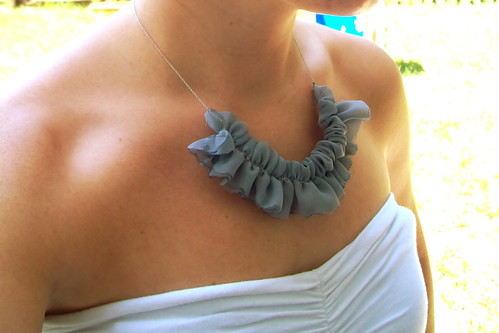
Not in the mood for a Halloween project?   How about this really cute ruffle necklace.  This has been on my list for a while so maybe its time to cross it off!
Or how about heading over to Target and picking up a pair of Odell Flats for a shoe refashion? 
Did I help you out at all?! What do you want to make this week?  {Whether you are going to Project:craft or not!} 
Photobucket

Sunday, October 18, 2009

Spooktacular Frames


I got two of these 11x14 frames at Target for $3.00!  I have other ones in my house just like them that I didn't pay $3.00 for.  I love them though.  I need more on a wall in the dining room so I thought these might help.  I decided to use up some of the burlap I have to make some halloween-ish art.  I think it will work for just fall decor also.


Whoops I didn't rotate the photo.  But I cut an 11x14 piece of fabric (from the Spooktacular line) and used spray adhesive to glue it to the piece of cardboard that came in the frame.


I loved the swirls in the images I picked (from the DB Fright Night font) and I knew there was no way I could get that detail from stenciling so I cut them out on our vinyl cutter.  I put this tree on a 5x7 piece of burlap.


Then put that on the black and white fabric.


For the other frame I glued burlap to the cardboard insert then just put the pumpkin on the burlap.  I think the pumpkin was about 10x10.  


I hung them up a little off center next to my REALLY big star.


I am still trying to figure out what else to put up so I stare at this wall a lot but It definitely looks better.

I'm linking this to the DIY Show Off Fall Festival!

The DIY Show Off


LinkWithin

Related Posts with Thumbnails